

TNJadeonar
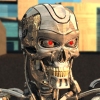
Member since: 2007Heya talented Swag artists out there, I was messing around in photoshop a bit, with a cropped pc game screenshot for my newest SW RPG character
Black Arrow - Madelyhne Glouter or basically, -= This picture right here =-
What you will need is this file provided right here: -= scanlines.zip =- which I made in Adobe Photoshop CS2
(can anyone confirm they work in earlier versions of photoshop? I sent this package to Hisham, though he hasn't had time to try it yet)
The instructions below, are what I typed up in notepad, nor have I had a chance to optimize the process yet, but I am honestly curious as to your opinions! This effect works on any picture - drawn or photograph.
And Hisham, your the one who prompted me to post it here, so I hope this is received well :)
Intructions begin here:
--------------
Before you begin, you will need to place a few preset files included into your Adobe Photoshop program folder.
Hologvid Scanline Layer Effect.asl
Custom Holographic Scanlines.grd
Custom Holographic Scanlines.grd => goes to =>
C:\Program Files\Adobe\Adobe Photoshop CS2\Presets\Gradients\Custom Holographic Scanlines.grd
Hologvid Scanline Layer Effect.asl => goes to =>
C:\Program Files\Adobe\Adobe Photoshop CS2\Presets\Styles\Hologvid Scanline Layer Effect.asl
1. Load desired image into Photoshop.
2. Right click in layer, Make Duplicate Layer 3 times:
- Label them in revers order: 3, 2, 1
- You should see them listed in order as:
- 3
- 2
- 1
- Background (locked symbol)
Note: These will correspond with the styles layers later on. For some reason the order sequence dosn't quite line up, then click and drag to re-arrange them as shown above.
3. Hide background layer
3a. Hide Layers 2 & 3. (only layer 1 should be visible)
4. Layer 1:
4a. Select Layer 1. Zoom out until you see grey bordering the picture.
4b. Use the rectangular Marquee tool, (Should be the top left one, above the lasoo tool. Drag Marquee over picture in grey area. This will select the entire picture.
4c. Select the PaintBucket tool (7th tool down on right side - its dual function - PaintBucket and Gradient fill tool)
4d. Fill the marquee area BLACK color (R.G.B. values: 0,0,0)
4e. RIght click on Base Layer, Blending Properties
4f. Click on STYLES in the top-most Left column, right under the window title: Layer Style
4g. Click the little circular arrow icon just left of the OK / Cancel buttons,
- Click Small or Large List
- Replace Styles (or load styles if you have to. Can always RESET styles later)
- load file: "Hologvid Scanline Layer Effect.asl" and hit ok
- You should see 3 new styles at the very end
- Holo Layer 1
- Holo Layer 2
- Holo Layer 3
Note: These styles match up with the same numbered image layers. 1 for 1, 2 for 2, 3 for 3
4h. In layer Styles, click on Holo Layer 1, hit OK in the Layers Style window to apply effect.
Result should be a horizontal set of thin dark blue and light blue bars going across from top to bottom.
===================================================================================
Note: Manual layer settings for Holo Layer 1:
- Blending Options Bar: Custom
General Blending
- Blend Mode: Normal
- Opacity: 100%
Advanced Blending
- Fill Opacity: 100%
- Channels selected: G & B (uncheck R)
- Knockout: None
- Only "Blend Clipped Layers as Group" is checked
- Only "Transparency Shapes Layer" is checked
- Gradient Overlay Bar:
Gradient
- Blend Mode: Normal
- Opacity: 60%
- Gradient: (click box)
- Gradient Editor Presets:
- Click Circular button left of OK / Cancel buttons
- Load file: "Custom Holographic Scanlines.grd" , hit ok
- Click on the new gradient style at very end of the list, labeled "Custom 1", hit OK
Note: should be a muted bar of blues and light purples, with the gradient type as "Noise" ; Roughness 100% ; Checked Options: Restricted Colors, Add Transparencey
- Gradient style: Linear; Align with Layer (checked)
- Angle: 90 degrees
- Scale 100%
===================================================================================
5. Layer 2:
5a. Hide Layer 1, select & unhide layer 2
5b. Desaturate the image: Image -> Adjustments -> Desaturate (Or press: Shift+Ctrl+U)
5c. Right click on layer, Blending Options
5d. Click Styles: Select Holo Layer 2, hit OK to apply.
The result will be a barely visible 'ghostly visage' of the original image with a feint blue tinge, majority of the picture will have the grey checkered background indicating total transparency.
===================================================================================
Note: Manual Holo 2 Layer effects:
- Blending Options Bar:
General Blending:
- Blend Mode: Normal
- Opacity: 52%
Advanced Blending
- Fill Opacity: 63%
- Channels: G & B (checked) / (R Unchecked)
- Knockout: None
- Only "Blend Clipped Layers as Group" is checked
- Only "Transparency Shapes Layer" is checked
===================================================================================
6. Layer 3:
6a. Hide Layer 2, select & unhide layer 3
6b. Desaturate the image: Image -> Adjustments -> Desaturate (Or press: Shift+Ctrl+U)
6c. Right click on layer, Blending Options
6d. Click Styles: Select Holo Layer 3, hit OK to apply.
The results should be a slightly better visible image, in 'ghostly green' hues, still mostly transparent.
===================================================================================
Note: Manual Holo 3 Layer effects:
- Blending Options Bar:
General Blending:
- Blend Mode: Normal
- Opacity: 57%
Advanced Blending
- Fill Opacity: 100%
- Channels: G & B (checked) / (R Unchecked)
- Knockout: None
- Only "Blend Clipped Layers as Group" is checked
- Only "Transparency Shapes Layer" is checked
===================================================================================
7. Layers 1, 2, & 3
7a. Make visible layers 1, 2 & 3, and see the results - your picture should reasonably resemble something that'd appear on a holovid viewing screen
Notes: For optional kicks -
- enable the background layer, will give the picture a reddish hue / tint. Could be useful sometimes
- play around with the R, G, & B channels for each layer, to adjust and vary the "Holo image" tints. The channels allow which colors to come through or be blocked.
- Some funky effects - try Filter -> Artistic -> Poster Edges on one of few of the layers. Makes a real life image look cartoon drawn. could be useful.
You could also play with not using "desaturate" on some of the layers, to for different effects. More color will show through.
See what you think, and if any breakthrough changes / improvements, note them down, save the psd project file and send it on over ;)
Some other effects to try - toy with not de-saturizing the 2nd layer (or 3rd layer, fair bit of color remains intact that way) ...
Tip: Its generally best to select and apply these effects onto Layer 3, the top-most layer
Tip: if blending / adding in more images / pictures to one main picture, its usually best to do it onto the background picture and flatten, or make copy of background layer, add image, flatten the 2 new layers and make your next 3 Layers from that. (I hate messing with the Background layer)
Tip: Use the Marquee or Lasso tool to mark / select or de-select an area to apply filter affects to. Note: Some filters are imune to the marquee, and applies the effect to entire image. Sometimes best to apply these filters before the Layering steps process, doing a bit of advanced marquee, copy/select, effect then pasting.
I also toyed with effects (on Layer 3):
Artistic ->
Film Grain - makes it a little bit over-exposed
Underpainting - makes the image slightly blurred out, obscures the details as if its a bad transmission or reception
Brush Strokes ->
Accented Edges - can make a photo look cartoon drawn
Cross-hatch - has interesting effect on faces
Dark strokes - blurring effect
Ink Outlines - interesting
Spatter - adjustable distortion, not as strong as Sprayed Strokes. Nice distortion if smoothness on max.
Sprayed Strokes - really bad / fuzzy transmission garbled / breakup
Distort ->
Diffuse glow - interesting
Lense Correstion - hmm...
Glass - super bad signall loss
Ripple - your average ripple
Pixelate ->
Fragment - again, classic signal interference , possibly attempted signal jamming
Mezzont - uber bad signal breakup
Mosaic - user adjustable pixelation here, really awesome in the low values 10 or lower. again, good for crypto/ decrypto or whatever use.
Pointilize - more speckel effect , like thick interference snow, has the right 'fuzz factor' also, at value 3
Sharpen ->
Sharpen
Sharpen Edges
Sharpen More
Smart Sharpen
Unsharp mask
Sketch ->
Chalk & Charcoal - interesting
Conte Crayon - some bad interference, with a film negative effect
Note paper - interesting
Water Paper - again, fuzzy breakup effect, for some variety
Stylize ->
Diffuse: Normal - adds a bit of interference.
Diffuse: Light/Dark - does as it says.
Diffuse: Anisotropic - really works well to unsharpen the picture a bit, blurring the finer details. makes it really look like an authentic video feed. Especially works best if you've got stuff in the background thats just slightly out of focus.
- Btw - works awesome if you use the mask/marquee tool to select the area you want or don't want the effect to be applied to (usually marquee over the area you don't want to loose sharp focus on, and then goto: "Select: Inverse" (Shift-Ctrl_I) , goes great if you've got a few images combined into the picture like a video insert. *However, using Diffuse:Anisotropic does not work to single out an area from the picture with the marquee. Seems to be an entire picture-wide effect. My advice would be do this effect at the very start if combining a few pictures together before the other effects. Only applies to Diffuse:Anisotropic*
Emboss - interesting and weird...
Extrude - interesting and weird...
Find Edges - may have its uses...
Solarize - may have its uses
Tiles - hmmm... not sure.
Trace Contour - can be useful. 100 and around seems to be the sweet spot for setting value.
Wind - possibly useful as jamming interference or something
Texture ->
Grain - adds film grain, looks like 'snowy reception'
Patchwork - signal encryption / decryption! :D
Texturizer - add your own texture here for some effect...
Stained Glass - could work with reducing the values to minimal
Other ->
Highpass - could be useful, higher values gives a random cloudy effect
Maximum - could be a useful alternative to Diffuse Anisotropic for selectable areas
Minimum - samilar to Maximum
Offset: - very interesting, possibly useful
I think all we'd need to do is whip up a few 'holo vid' style panel screen borders for any image, picture or photograph to look convincing. And yeah, it really does work well with an actual photographs
Addendum:
Couple help screens:
Loading_the_Gradient_effect.JPG
Replace_Custom_Layer_Styles1.JPG
Replace_Custom_Layer_Styles1a.JPG
Replace_Custom_Layer_Styles1b.JPG
Again, let me know what you think - opinions, critique, improvements & opimizations to this technique. I do have to admit, after trying many pictures, I have found the step process fairly simple and easy to do...
And as an end result, using a screencapture from the pc game: Star Wars Republic Commando, I did make an amusing mock-up of a Galactic HoloNews Network (CNN spoof): -= Clicky here =-
Just imagine to what effect you could use this technique in your original artworks! :)
Damn! That's all too complicated for me to even read, let alone attempt!
Me draw picture. Me color picture. Me no understand tech stuff. :p
It sounds / seems more complicated than it really is! honest! :angel halo:
Ok, so the step-by-step needs to be worked on and reduced in the number of steps. But honestly, what's your opinion on the finished results as an image technique?
I think it works great for a large number of requests envolving holograms. It can help with the effect and make it faster as opposed to my "technique" which involves make 1 pixel thick blue and black bars evenly spaced and lowering the opacity on them :p
Why not just make a brush out of it Drig.. then you can use it on everything... :)without having to do the lines over and over again...
Sounds good to me, although I havent done anything involving a hologram yet... :P
hehe... makes sense... Maybe I'll give you a hologram request.. so you can play around and see what you think of the ideas.. lol
Glad to hear Drig, if you can make use of it, kewl :) If you monkey around with it and make new discoveries with it, even kewler!
And to anyone else who gives it a test drive :)
Additionally, the listed photoshop effects really look nifty, especially if simulating 'bad reception' on a flat-vid type device (wall unit, datapad, etc) as a picture within a picture.
Xanamiar - I didn't know you could make brushes for stuff like that. I honestly don't use photoshop that much as my main app, and this effect i stumbled upon by accident (then it was just a matter of retracing my steps and then testing the technique on a variety of random images). I don't digitally draw in photoshop, nor do i have a wacom tablet.
Care to post your holo-brush techniques? As a step-by-step guide?
All in all, I think the more options & tools a person has to work with, when creating their projects, all the better I say. Thats what this forum is about and for right?
I'm not an artist at all TNJ... I'm just one of those tech guy's that knows how the programs run, but can't do anything to artistic with them...